kodbasen
Where the compass is spinning around software


Development Kubernetes Docker, Cloud

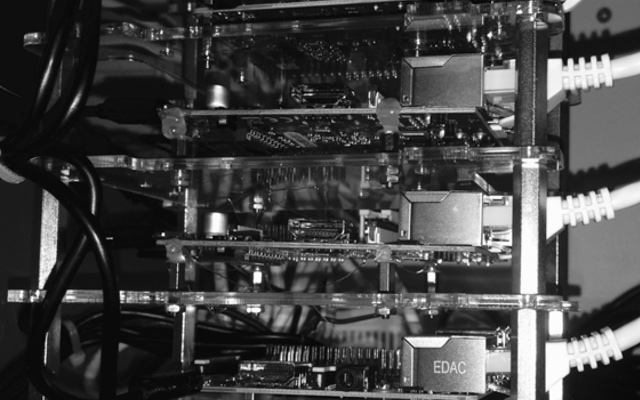
This post is the first in a series on setting up Kubernetes using the bare-metal cloud provider Scaleway. Scaleway offers bare-metal servers both for ARM and x86-64. I will show how to set up Kubernetes on ARM using the Scaleway C1 server.
This work is done to the best of my ability, but you should know that i’m new to Scaleway and i’m writing this in my spare time, and sometimes in a haste. See it as an inspiration. Your feedback is always welcome.
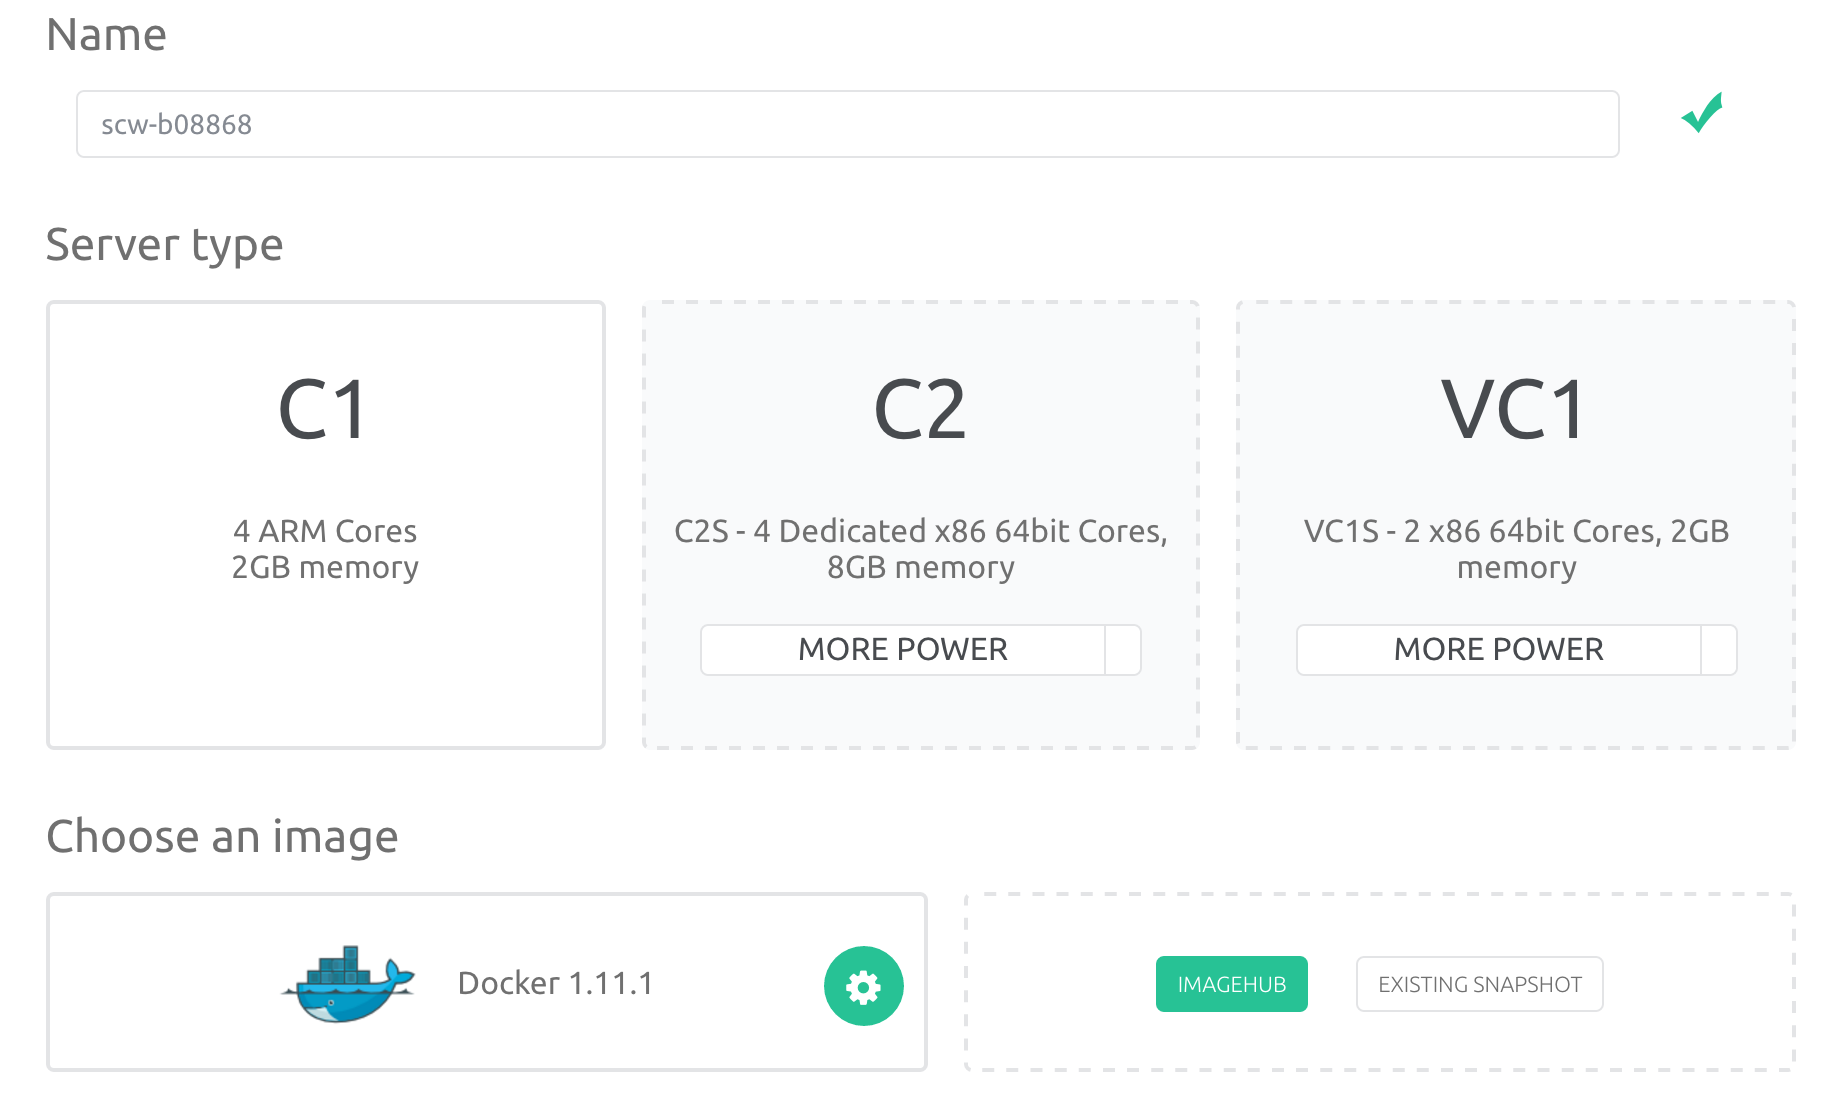
First you need to sign up for a Scaleway account. Then head over to the Servers page and create two C1 servers. Select the Docker image from ImageHub and make sure you assign a public IP for both servers.
I had some problems with the dynamic link interpreter for the hyperkube binary, but creating this link on both servers fixes the problem.
root@scw-xxxxx:~# cd /lib
root@scw-xxxxx:/lib# ln -s arm-linux-gnueabihf/ld-2.23.so ld-linux.so.3
You know what Sloop is right? If not take a quick look at this earlier post: Building your Kubernetes cluster in minutes.
Clone the Sloop project on both servers and
create a sloop.conf file in the Sloop directory that looks like this:
K8S_VERSION=v1.3.5
FLANNEL_NETWORK=10.10.0.0/16
FLANNEL_BACKEND=udp

# This entry is only required on your workers
MASTER_IP=<your master server Public-IP>
MASTER_IP should only be set on your worker(s).
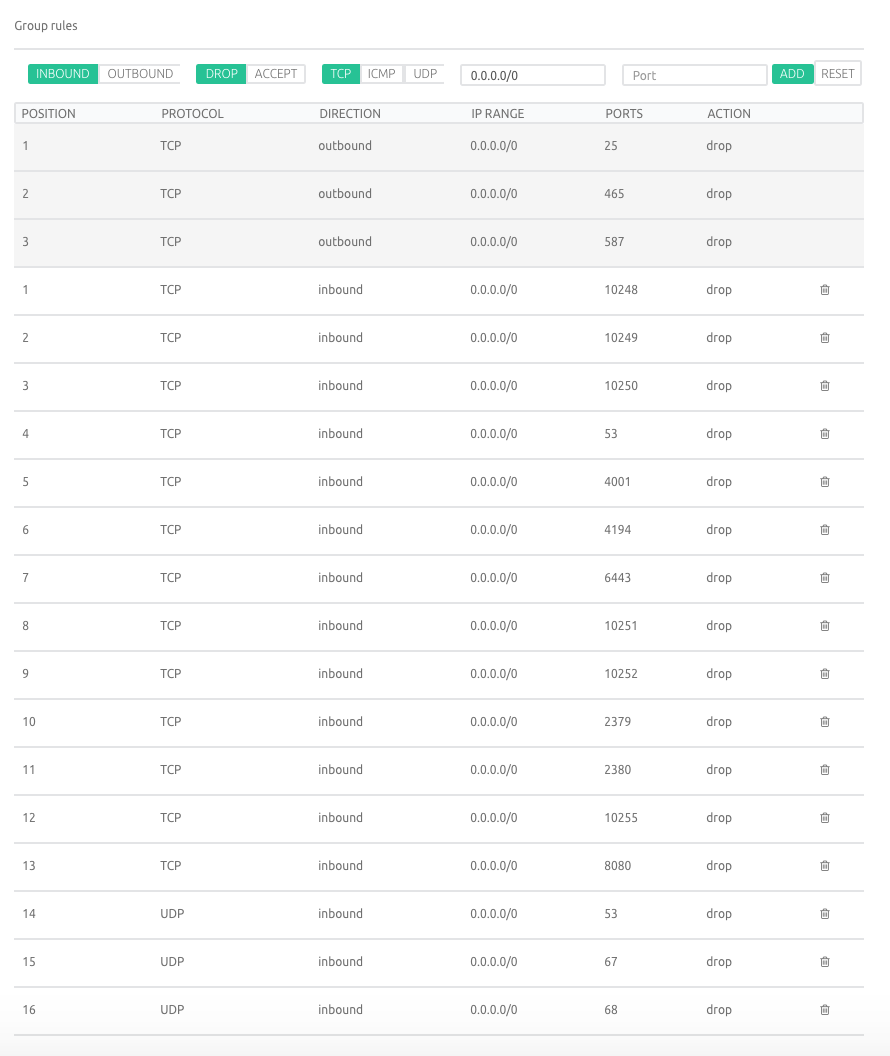
Scaleway offers Security for your network through static IP package inspection. Your rules are configured in a security group. The problem is that you can’t have a default rule that matches and blocks all inbound traffic last in the list, and only add specific ports.
You need to add rules for all ports you want to drop traffic on and add your server to the top of the list with a rule that accepts all traffic.
Now it’s time to start up your master:
root@scw-master:~/sloop# ./sloop-master.sh
You can verify that your master is running using kubectl:
root@scw-master:~# kubectl get nodes
NAME          STATUS    AGE
10.1.xxx.xxx   Ready     1m
root@scw-master:~#
root@scw-master:~#
root@scw-master:~# kubectl cluster-info
Kubernetes master is running at http://localhost:8080
KubeDNS is running at http://localhost:8080/api/v1/proxy/namespaces/kube-system/services/kube-dns
kubernetes-dashboard is running at http://localhost:8080/api/v1/proxy/namespaces/kube-system/services/kubernetes-dashboard
Now it’s time to bring up your worker:
root@scw-worker:~/sloop# ./sloop-worker.sh
If you switch back to your scw-master server and run kubectl get nodes you
should see two nodes:
root@scw-master:~/sloop# kubectl get nodes
NAME          STATUS    AGE
10.1.xxx.xxx   Ready     1d
10.1.xxx.xxx   Ready     1d
Your api-server is unprotectd and we added a rule to our Security Group to block all trafic on port 8080, but you can verify that everything works by accessing the
dashboard on http://<MASTER-PUBLIC-IP>:8080/api/v1/proxy/namespaces/kube-system/services/kubernetes-dashboard, if you remove the rule.
We now have 2 nodes running Kubernetes on ARM. In the next post in this series i hope to show how to setup an ingress-controller with certificates and how to secure your api-server.
17 Aug 2016 #Development #Docker #Kubernetes #Sloop #ARM #AMD64 #Scaleway